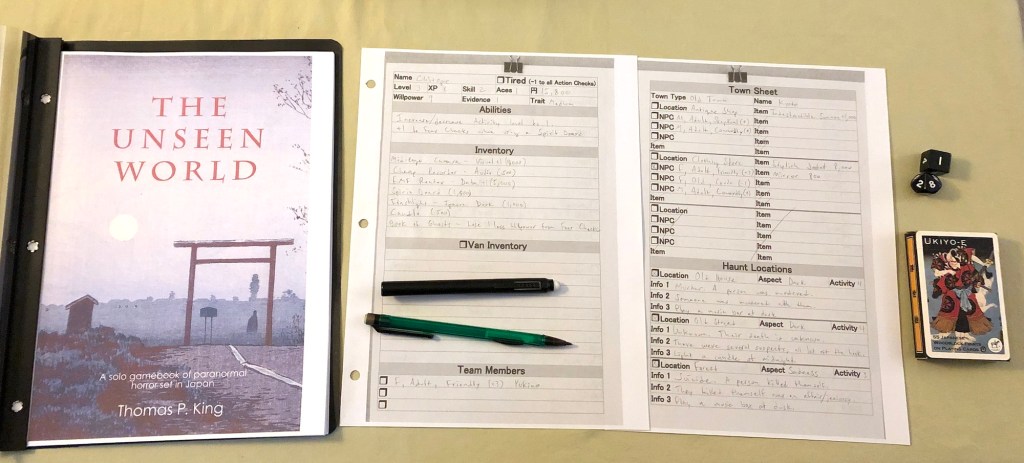
Here’s a look at The Unseen World, a solitaire gamebook of paranormal investigation and horror set in modern-day Japan.
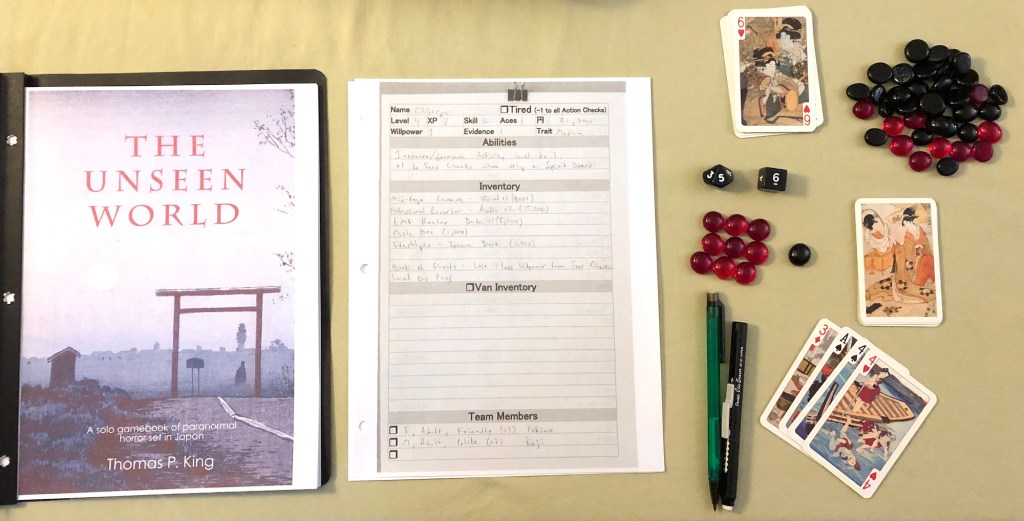
The gist of it is you travel from town to town, research haunted locations, then investigate those locations, resolving a series of encounters. Almost everything in the game is randomly generated using a series of tables. Checks are made with cards. Your Action deck uses the 2, 3, and 4 of each suit and an Ace from a deck of standard playing cards. The Challenge deck uses the 6, 7, and 8 of each suit and one 5 and one 9. When making a check, you reveal a Challenge card, then play a card from a hand of 4 Action cards. You apply modifiers based on the situation, then you can Push by discarding the top card of the Action deck and adding it to your total.

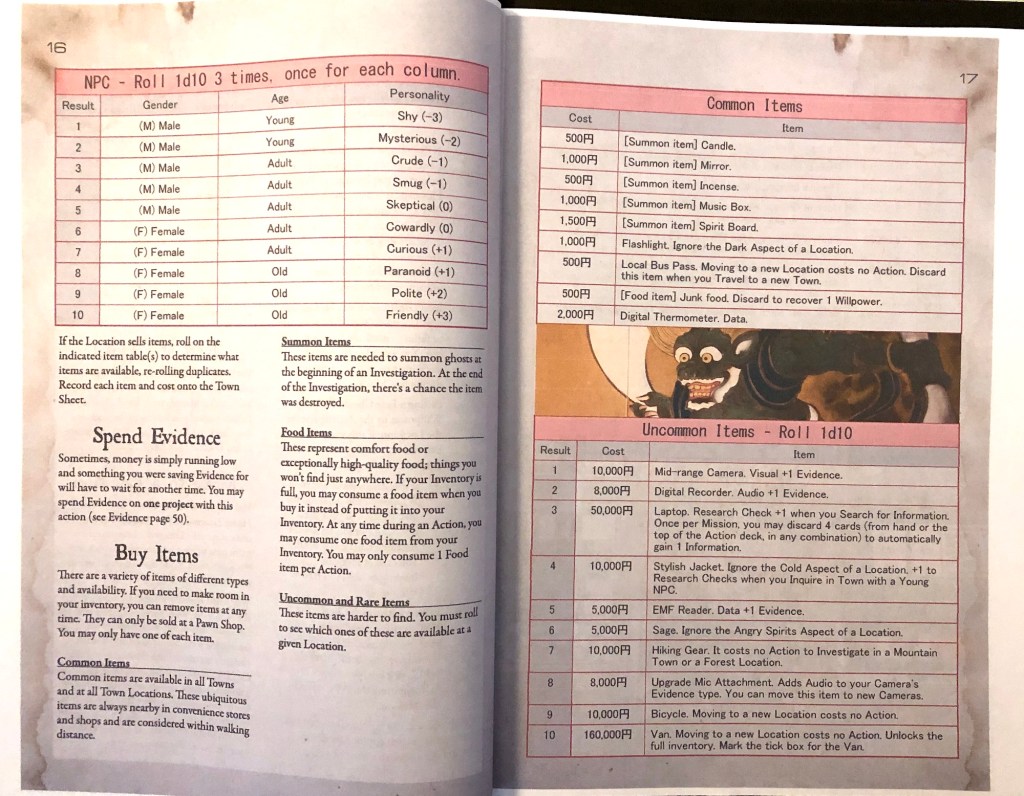
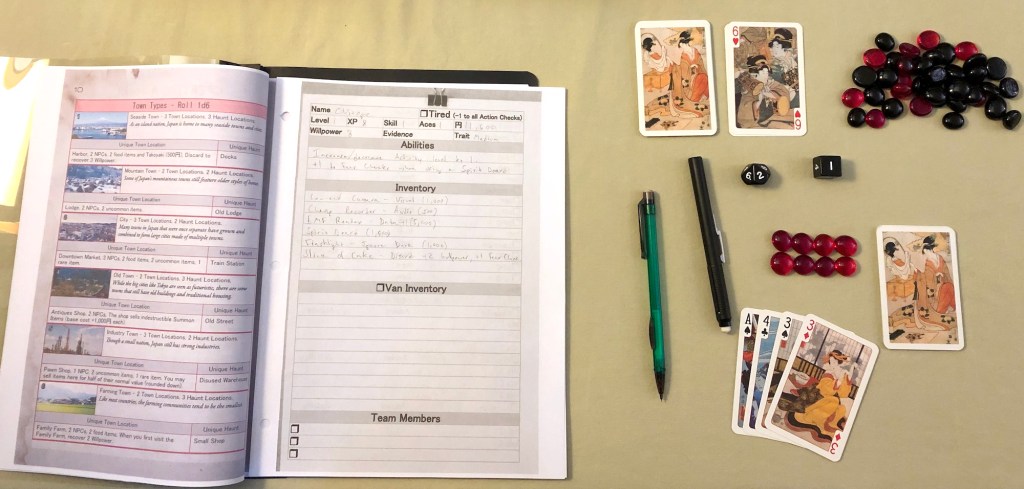
This is my third investigator so far during playtesting. This time, she (Chitoge) is a medium. Each haunted location has an activity level that determines how many encounters there are and how much willpower you lose for failing fear checks. As a medium, she can raise or lower the activity level by 1, making it safer or more challenging but also affecting the amount of evidence she can collect. She also gets a bonus when using a spirit board on an investigation.

The First Town
My first town came out as a City with a Clothing Store and Shopping Street. I named it after Harajuku in Shibuya, Tokyo, it felt appropriate. There were a lot of good items for sale, but just starting, funds were very short. The food ended up being very helpful, though. None of the locations were the Info sub-type which would have made research easier, so Chitoge had to rely on NPCs. Weirdly, everyone at the Shopping Street was Smug (-1 modifier) which ended up being useless! But the Clothing Store had a couple of very helpful NPCs, an old couple who seemed to know everything about the town.

The first investigation was at the local forest where a fire killed several people. To summon the ghosts, I needed a music box. Oh, how I have come to loath the music box! The investigation was rocky, running out of willpower, but I made it out with enough evidence for a nice online video (after increasing the activity to 4). The music box broke, though. After an investigation, the summon item has a chance to have broken during the night. I still didn’t have enough money for any real splurging, so I just bought some food for the next investigation and a flashlight (since the next place had the Dark aspect, -1 on all fear checks).
The second investigation had some bumps, but I had a +1 from using the spirit board this time (which also survived the night!). Since that was the last haunted location for Harajuku, it was time to head home, which was perfect for my situation (having low willpower).
At home, I was able to buy 2 items and bought an EMF reader (to collect more evidence) and a slice of cake (food items are one-time buffs and restorative items). I recovered my willpower and set off for the next town. Each time you travel, you have a chance to get a lead (free research) for the next town, and I managed to get a lead.
The Second Town
The next town was an Old Town with an Antique Shop and another Clothing Store (what are the odds? Well, technically, it’s 1-in-10). Haunted locations were Old House, Old Street, and Forest. I named the town Kyoto. This time, there were fewer helpful NPCs, but one, in particular, was very helpful, a Friendly (+3) woman that worked at the Clothing Store. All the most helpful people apparently work in clothing stores! Getting research done for the Old House was easy!
The house itself was a mixed blessing. I lost my willpower, lost another music box, and needed time to recover. I bought several Junk Food (recover 1 Willpower) items since there was no other food in town. For better or worse, the next bout of research took an extra day than expected, which I could afford (you pay for a hotel room at the end of each day and recover 3 Willpower or become Tired and suffer -1 to all checks until it’s cleared). After leveling up, though, my Skill went up to 2. Skill determines the value of your Ace cards, which starts at 1 (bad!).
The second investigation was the Old Street and it went all right enough. The candle I used to summon the spirits made it through the night. Instead of splurging on anything fancy, I recruited the +3 NPC, and gave her the name Yukino. At the end of an investigation, team members cost money to keep around, regardless of whether you used them (they still had to go with you). Since money was getting tight and I had a team member, for the final investigation, I left it at activity 3 (lower than I had been doing) to try and not lose my Willpower. Everything worked out, except for another broken music box, and I had some money for the road.
Traveling home, I decided to buy a camera upgrade, so now my Visual and Data evidence are both +1. More evidence, more money! I also bought a Book of Ghosts which reduces the Willpower lost when failing fear checks.
The Third Town
No lead this time as I head to a Seaside Town with a Harbor, Museum, and Library. I named it Yokohama. With two Info locations, research was going to be much easier. Which was good since there was only one helpful NPC from all three locations (and strangely, only men in this town!). For haunted locations, we had the Docks, River, and Shrine. All of them ended up at 3 activity (the Docks had the Quiet aspect which reduced the activity level), but that wasn’t an issue for a medium!
Chitoge got to re-use her spirit board at the Docks, which made the investigation a breeze with Yukino’s +3 (a once-per-investigation bonus). There wasn’t anything interesting for sale in town, so the money was just set aside for when it was time to travel.
Before heading into the next investigation, I decided to recruit the only good NPC in town and named him Koji (certainly not after famed horror author Koji Suzuki, no, of course not). The river investigation was surprisingly mild with no tough encounters (which also meant less evidence) and using the spirit board again. The board, unfortunately, finally broke this time. I didn’t end up using either team member but had to pay them anyway.
The final investigation for Yokohama was the Shrine. Another music box… surprisingly, the music box made it through the night intact. Once we left town, I bought a recorder upgrade and a training manual to increase Koji’s bonus from +2 to +3. I also splurged for travel to make good on my lead and also increase the town locations for the next Old Town to 3.
Until next time!
